Showing posts with label projects. Show all posts

Monday, December 28, 2015

The New 'C'

I did it. I found my new 'C'.  Although I did give in and make a couple of cakes right before Christmas, it's not enough for me to keep the 'cakes' in the name.  I have finally entered the Cricut world and have really started crafting. The crafty level just went up to a whole new level here at the crazy house!  The possibilities are endless with my new toy.

I have also become more self aware over the last year and realize it doesn't really matter what the current 'C' is for me because it is very likely to change the minute it stops being fun.  That's not really ADD for me just the way my brain is wired and I'm finally ok with that.  Some of us you out there are meant to be the realist and some of us are meant to keep wondering about Wonderland.  Welcome once again to my world.


https://www.facebook.com/livepersonalized/?fref=ts


https://www.facebook.com/livepersonalized/?fref=ts

Come by and check out my Facebook page for more: https://www.facebook.com/livepersonalized/?fref=ts

Wednesday, February 8, 2012

Organizing!


I have finally got the organizing bug!  We are set to move in July, so it's too early to start packing (even though I really want to start!) I have had to come up with something to keep me motivated (besides getting this house ready to rent out).  And with my new love (obsession) Pinterest there are so many ideas out there...I could cruise all day for inspiration. 

I have decided to tackle one room/area a day and get the house as organized as possible.  One, it will make it easier when it is time to pack up and two, if I get a good system down now we will all be used to it so it will work right into the new house.  Always thinking :) 

A running theme on these amazingly organized Pinterest people is baskets...lots of baskets, fancy or not, plastic, rubber, wicker, with handles or whatever works but lots of baskets!  

I recently finished my Fridge and Pantry redo!  I am so excited to show you.  The Fridge idea came from I think this link... for the baskets which I found at Walmart (they had smaller ones at Target).  And for the Pantry...This blog has a ton of ideas!...I found a bunch of the rubber buckets with handles at the Dollar Tree. Then these Sites had Free labels! I kind of smushed the ideas together and did what worked for my space and my stuff.  I am very happy with how it turned out.  


Before...the mess! and what you don't see, a storage container on the other side of the kitchen so I always had to go back and forth and dig in the drawers for some of my baking supplies.  Now it is all in one place and I can find what I need!

After...
with the labels on...


and the fridge with the baskets with handles.

love these, you can just pull out what you need to make lunches, or the condiments for 'burger night' ...all in one place.

I also broke down all the snack boxes like cheese its, flip crackers, animal crackers, etc...and put them into snack bags.  Now they are in the 'lunch box snacks' bucket...easy to grab and toss into lunch box.  And I don't have a fancy machine (I really want one!) and my sticker machine is even out of laminate so I had to get crafty.  I cut out the printed labels and put them between layers of the clear package tape...it laminated them just fine.  It didn't take as long as I thought (you know, overwhelmed for a minute with most of our food pulled out onto the kitchen floor with my 2 year old rummaging around pulling out old candy) and it was worth it.  What areas are you reorganizing? I would love more tips!


Wednesday, December 21, 2011

Christmas Projects

Is anyone else wondering where this month went?  It doesn't matter now, we are here and I am so excited for Christmas this year!  I did a few projects and actually got everything shipped off on time...and with us being military our family gets more scattered every year.  I had packages going from GA to OK, AZ, TX, etc...crazy!

Anyway, here are a few projects I finished that were pretty inexpensive and easy to make.  Each is personalized though which I love...of course I didn't get a pic of my nieces gifts, so bummed!  But out there in blog world and Pinterest I saw the $ store cookie sheet idea.  You paint the front with Chalkboard paint, embellish with a ribbon on top and there you go, a cute tray to hang on wall or fridge for notes, etc...except I went a little further and printed out their initials on pretty scrapbook paper and mod-podged  in the middle and added a few decorative magnets.  SO CUTE!  I will have them send me a pic when they open them.

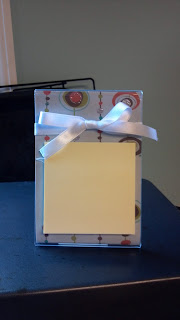
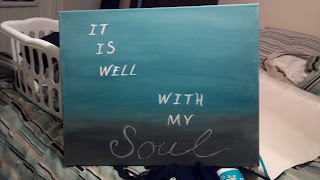
The others are pretty self explanatory. I found some cute, football shaped glasses at the $ store and painted the OU (Oklahoma) letters on the side for my BIL.  Again from Pinterest the $ Store plastic frames with scrapbook paper and post it notes for the Teacher gifts, and the painted canvas' where you put stickers, paint over the whole thing and then peel off the stickers...that one is addictive and I will be making more!


I would love to see some of your projects.

Have a blessed Christmas!


Friday, November 4, 2011

Dresser Redo--for FREE!

Hey Everyone, I just finished a project and wanted to share the cuteness.  As we have outgrown our house I keep shifting furniture around and trying to find storage...it's getting old, but we are moving in about 7 months so I don't want to buy anything new right now.  I have a space on 'dining area' wall going into kitchen that was bare.  I really need a nice buffet but at this point the kids art supplies and craft stuff have taken over.  My parents found this sturdy wood dresser for me a while back for a good deal. It was super ugly green, and I mean different shades of green on different drawers, like dark hunter green and gray shades!  But it has lots of drawers and that is what I needed.  --Oh man, I just realized I don't have any before pics so you will have to trust me.

I won't go into a lot of detail because I know we all do a lot of repainting and re-purposing.  Basically a light sand, a couple of coats of primer, a couple of coats of white paint and it looked much better!  I wanted to play with an idea though so I kept going...I have this fabric that I made into a panel covering the glass door, recovered a LR lamp shade, and recovered my sewing chair with that has my blues in it and flowers, too cute.  I went with those shapes and made a template on paper of a big petal and the middle circle.  I traced it off center on the dresser and painted it with leftover house paint.  Then I free handed another flower design from the material and same thing.  Final touch, spray painted knobs with some leftover silver I had from redoing the kitchen cabinets.   I love it and you can't beat free!  I painted our dining table too and it really lightens the room, gives it a little whimsy and I love whimsy.  


My paper petal, crafty I know.


What do you think?  Well, I am off to focus on the bathroom I'm stripping of evil, super stuck wallpaper...we are putting the house up for sale/rent and I really need to finish that before I play any more (that's for this week anyway) :)  


Thanks for stopping by.

Friday, September 30, 2011

Kitchen Fridge--Drab to Fab!

Hey All,

     I am so excited to finally be done with my kitchen! The stripping of wallpaper and painting cabinets has been done for a year now although I can't find many of my before pics. Let's just say it was a step back to the early 80's with floral wallpaper, cream cabinets and appliances, and to top it off peach and green drapes.  Yuk!  We are redoing on a budget so I am doing most of the work myself with Prince Char doing the heavy lifting.  That was 3 weeks of steaming and cleaning but I love the way it turned out...white cabs, new knobs, turquoise on top, tan on bottom, and much cleaner.  Anyway, this summer we had a pipe break and flooding ruined our floors.  Not what I wanted to deal with but I got pretty new floors, and since they had to rip out sheet rock from the pantry I got to paint that too to match my pretty turquoise walls.
     All that clean up got finished then our dishwasher died, of course.  Well you remember the cream appliances?  No more--we got a black dishwasher and since our stove was also about to die (so I convincingly told the hubby--and really it did start to die a couple of days later) we got a shiny, black stove too.  Now here is the funnest part--we had no money in the budget for a new fridge, so what was I to do?  My oldest daughter's fave show is 'Good Luck Charlie' and they have the coolest fridge.  It is chalkboard on the front and they write all over it...love it! I primed it once and about 3 coats of chalkboard paint on the front and done.  We are just waiting out the 3 day drying time.  But what about the ugly cream sides?  I got that covered, literally.  I was at the $ store a while back and had found this contact paper I loved.  It is circles, I love circles! It was also my blues and tans...perfect!  I bought 3 rolls knowing I would do something with it.  It is now on the sides of the fridge.  What is easier than peel and stick?
     We can't wait to start writing on there!  Menus, schedules, food list....so many choices!


That ugly light fixture is going next.


Thanks for stopping by!~

Saturday, June 11, 2011

Sewing for Summer!

I don't know what happened to Spring, but I only got like one outfit done.  It's ok, I'm moving on to Summer and have been on a roll.  I took a couple of days just for me (go Mom's!) with no running errands or having to be anywhere.....so great!....and sewed up a couple of things for my girls and a quick purse for me.

No patterns, just some simple stuff but I had fun and I love my new little summer bag.


I love these kinds of tops but I need more practice.

A little Tinkerbell dress

Love this pillow case top with the shorts!

I still have a couple of pillowcase outfits to knock out and I'm working on a little tag baby blanket today.  I will post more soon.


Saturday, April 2, 2011

Sewing for Spring!

I am so excited for Spring!  I finally got to my sewing machine for some practice.  I have been wanting to make Little Miss M something with this material for a long time.  I made the pants first then just a simple 'pillowcase' top, but didn't love it(and it was too big).  I cut some out of the back, added some elastic and made it into a halter top.  It was my 1st time to attempt this, I learn as I go.  I love it and think it turned out pretty cute. 


Ok, the doll had been without an outfit for a couple of weeks and it was driving me crazy! No judging!

She likes it too.  Thanks for stopping by!

Saturday, March 5, 2011

Baby Gift

A dear friend of mine is due any day now and I have put off her gift until the last minute, of course!  Finally today during nap time I got it knocked out. Thank goodness once again to Heat n Bond (I know, new obsession) This is baby #3 so I didn't want to leave out big sis and bro.  I decided on doing something for all of them to wear.  I picked a super cute material that had all their colors and used it for all 3, but not too 'matchy-matchy' so they could wear them anytime.  What do you think? 

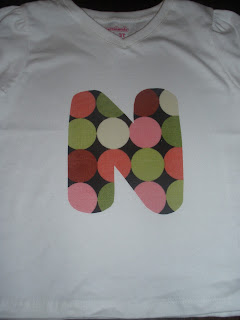
Tie shirt for bro, Initial shirt for big sis, and flower/booty ruffle for baby


I am loving the booty ruffle!
Now to get them mailed to her before she sees them on here!  Thanks for stopping by!

Check my side bar for the link up parties I join. I also just joined the The DIY Home Sweet Home link up.

Friday, February 18, 2011

Boring Hoodie turned cutie!

Hi there, ok so I saw the cutest idea when I was cruising craft blogs and knew I had to make this.  The problem is I didn't save the blog so I don't know who to give credit to...I looked all over and can't find it again, dang mommy brain.  So, if you see this and it was you or you know who or where it was, please stick her link on here or message me so I can give credit where it is due.  Found her!!!  The idea is from A bit of sunshine ...whew, feel better now!

Basically, I got to play with the Heat n bond again :)  I used the same fabrics I used for Little Miss M's stuffed owl to dress up a plain sweatshirt hoodie.  I have a couple sitting around from when I found them for a $1 at Target.  I cut an oval for a background, googled an owl shape, cut it out and added a couple of eyes and a beak...ironed it all on the hoodie and there you go...super cute.  But to add an extra touch, I (following the afore mentioned idea) took a strip of material and sewed a tube, did a stitch down the middle to pull and wrinkle up and sewed it around the edge of the hood.  Little Miss M grabbed it as soon as I was done and put it on strutting her stuff.  I think she loves.  It was so easy I was able to knock it out during nap time...if I wasn't distracted catching up with Grey's Anatomy I could have finished another one.  Oh well, that's for another nap.  Thanks for stopping by.


Please excuse the training potty...I had just pulled it out of storage.  So tacky, I know.

Monday, February 14, 2011

Valentine's Shirt

This is the most fun I have had getting ready for Valentine's yet.  Today is Diva's party and she is ready!  I made this cute shirt for her.  This is my 1st time to do anything like this besides the Tie shirts so I think it turned out pretty cute...remember I am new to the crafting world and not quite sure of my creativity level yet.  It's a whole different thing than cakes :)  Anyway, have I said I love Heat n Bond?!  Well, I do!  I used it on the heart material and even the rick rack stuff around the edge.  Then I just hand stitched the buttons on for a final touch.  We also did a Sweets Jar for her teacher.  I can't wait to deliver that and the cupcakes today.


Friday, February 11, 2011

All Boys Valentine's Party

     Ok, so Skaterboy is in Pre-k and has the cutest class.  It is 6 boys, that's it, 6 boys...God bless their teacher!  Anyway, she wanted them to have a Valentine's party on Thursday and I told her good luck.  She is wonderful though and pulled off a super cute party.  Now for my part...Skaterboy wanted Cake Pops, too easy.  I whipped up a batch of those and started working on gifts.  I has missed out on the Christmas party gift thing, so I wanted to make up for that.  What do you do for all boys though?  I knew there would be bags of candy, maybe some cars, etc...we had found Valentine's that were paper airplanes on sale last year so that was a definite.  I asked Skater and he said the boys liked his 'Tie shirt' and I had some extra white t's lying around....so I made the boys 'Tie shirts' so they could match.  We just rolled them up and put them in brown paper sacks.  The boys were so excited!  We are trying to coordinate a day for them all to wear them for a picture, maybe Mother's day? 
     The teacher gift turned out super cute I think.  I found a couple of glass jar with lids at my favorite junk store.  I grabbed my enamel paint and painted on 'Sweets Jar' and some candy, baked, and filled with candy.  We tied a red ribbon and card around it and called it done.  I love it!


They looked a little messy in the box, but were so good.

I loved this face!

Aren't they too cute?!

Skaterboy and his super sweet teacher

Little Miss M and her Cake Pop!


I'm linking up to It's a Hodgepodge Life , Tatertots and Jello , Be Different Act Normal, The Girl Creative